Showing posts with label Dessert. Show all posts

Tuesday, October 8, 2013

A new Pumpkin Pie


Just in time for the Thanksgiving Holiday - a Spelt Crust Pumpkin Pie!   Last week I watched a few minutes of Anna Olson's Baking show and it was about making the perfect pie - which included a very seasonally appropriate, Pumpkin Pie.  It instantly sparked my interest as I got making it with a little skip in my step. A few things caught my interest on this particular recipe.
1.   The crust was made with butter (not shortening) and had lemon juice in it. I don't think I have ever heard of lemon juice in a pie crust.
2.  She made this beautifully creative braid around the crust which beats my efforts of trying to crimp the edges just right.
3.  The pumpkin filling called for fresh ginger... I have only used fresh ginger in my cooking but why not?!
4. She only used 1/2 cup of sugar.  Seemed like so little compared to most recipes so I did not adjust the amount.  

All this plus my undying curiosity as to whether I could make a flaky crust using spelt flour and company coming got me moving pretty quick on this.


The end result was delicious!  The crust was super flaky (with a small hint of something different) and the ginger in the filling was just right.  Likely could have used a bit more ginger than I added but not over powering at all.  It is also mildly sweet so if that is a concern, you could add the traditional 3/4 - 1 cup of sugar for something sweeter.  I would totally make this again and that is why it is going on my blog...so I know where to find my recipe.  If you would like to see Anna's original, click here.

Pumpkin Pie with Spelt Crust

Crust
1 1/2 cup light spelt flour*
1/2 tsp salt
10 Tbsp cold butter cut into cubes
1 large egg yolk
3 Tbsp ice cold water
1 Tbsp fresh lemon juice

Filling
2 cups pumpkin puree
½ cup palm sugar*
3 large eggs
¾ cup unsweetened coconut milk
1 - 1 ½ teaspoons finely grated fresh ginger*
¾ teaspoon ground cinnamon
⅛ teaspoon ground cloves
⅛ teaspoon salt


I have always done pie dough by hand - using a pastry cutter in a bowl.  You can do that with this recipe as well but this time around, I chose to follow Anna's steps using a food processor.  I found using the processor, I did not make the butter crumb as small as I would have doing it with a pastry cutter and that does help create a flaky crust.

In a small bowl or measure cup, place some water (about 1/4 cup) along with ice cubes to get the water as cold as possible. Set aside until needed in the crust.  This water will be much colder water than just straight from your tap which helps keep the butter firm and then makes a crust flaky.  A little trick I learned from my mom.

Using a food processor, pulse the flour and salt to combine.
Add in the cold, cubed butter and quickly pulse to combine the butter into small, pea-size pieces.  It should look a little lumpy with small butter pieces.
In a separate bowl, whisk together the egg yolk, ice cold water and lemon juice.
Add all the liquid into the flour and pulse until it just barely comes together (it should resemble a crumble dough).
Using a clean work surface, dump out the dough and gently press the dough to create a flat, round disc.
Wrap the dough in plastic wrap and refrigerate for about 2 hours.


On a lightly floured work surface, roll out the dough to just under a ¼ inch thick.
Using a 9-inch pie plate (do not grease), line the plate with the pastry ensuring the dough rests easy in the bottom and sides.
Trim the pastry off right to the edge of the pie plate.
Reserve the remaining dough for the braided trim and chill it and the pie shell while preparing the filling.

Preheat the oven to 400 F.

In a large bowl, whisk the pumpkin puree, palm sugar and eggs together.
Add in the coconut milk, ginger, cinnamon, clove and salt and whisk until well blended.
Pour this into the chilled pie shell.

To create the braid trim, roll out the remaining pie dough into a long rectangle.
Cut the dough into thin strips about 1/3-inch wide (you may need to play with this to see what works best for you - as I had to do as well!). 
Braid three strips together.  You may have to make a few braids to cover the complete edge of the pie.

With any additional leftover dough, you can cut out leaf shapes.  I used a small round circle cutter and cut one circle and then overlaid the cutter to make two leaves of the one circle.


The key was to use a knife to detail in the veins to make them look like leaves.  Lay them over the braid joints in the crust
and then in the middle for the
         pièce de résistance!


Place the pie in the oven for 10 minutes at 400 F, then reduce the oven temperature to 375 F and bake the pie for another 35 to 40 minutes.  The pumpkin filling should be set and a little jiggly in the middle is fine.

Cool the pie to room temperature and either enjoy it like that or chill before serving.  


Cook's Notes:
Light Spelt Flour - Whole vs light Spelt flour is similar to the difference between baking with whole wheat and white flour.  Whole is definitely a heavier flour (and healthier with the whole bran included) which means baked products are not as light and fluffy and perhaps less flaky in a pie dough.  I am not sure how the whole spelt would work in this pie dough recipe but feel free to try it if you are adventurous.  For a guaranteed success, I would suggest the light spelt flour.

Palm Sugar -  See Sugar 101 tab at the top of the blog.

Fresh Ginger - Fresh ginger should be firm, light colored skin and fragrant.  To peel the ginger before grating, I suggest using the edge of a spoon to take just the very top layer of skin off.  It comes off in a very thin layer leaving the most of your ginger for grating.  Of course, some chose to just grate the peel in as well.  Try to use a microplane grater which makes a paste-like grate for no lumps in your pie filling.


Wednesday, July 10, 2013

Nature's Perfect Cake


This is the most simple cake idea ever - wish I had thought of it.  
No Gluten.  
No Sugar.  
No eggs.  
No dairy.  
Vegan.  
Raw.  
Organic if you choose.  
  
Turn your WATERMELON into a cake!!!  
Presentation is definitely the key to pulling this off - even on kids.  
I have used watermelon for dessert but cut it up in slices in a bowl and it was just watermelon.  
When you turn your watermelon into a cake shape (preferably a double-layer cake height), 
add some fruit "candies" and suddenly - You are eating a cake.  Really.   


Be creative.  Use whatever fruit you have to decorate and present it as a cake.  I had strawberries sliced up, blueberries, apple triangles and mint leaves.  The color of additional fruit really is important and vital for appeal and transfiguration.  Serve it up on a platter or cake stand, add the candles, sing and slice it like a cake.  Perfect for the world of food trends and diets and allergies.

A few suggestions:
Watermelon shape:  Try to buy the longest, more oblong shaped watermelon you can buy.  If long enough, cut off the curved ends so you can have a cake entirely flat and round-shaped.  You can see I had to use part of my curved end which made it a bit more dome-shaped but it did not alter the experience for us who enjoyed it..
Fruit "Candies": Don't use bananas unless the cake is eaten immediately.  Even with apples, make sure the variety does not brown quickly or use some lemon juice on them to keep them from browning.  Try grape halves, cantaloupe/honeydew balls or possibly use small cookie cutter shapes (ie stars, hearts, circles/rings) to cut larger surface fruit.


Tuesday, December 11, 2012

Joy Tarts

I have many things I should be doing right now like laundry, cleaning, making meals, but something in me needs to be creative and expressive...so blog it is.  I have been meaning to blog this recipe for some time and now seems the perfect day and space.  Joy Tarts! 

This recipe was first discovered from a favorite blog I follow but made as larger Mounds Candy Bar . The Canadian equivalent to the US Mounds is "Almond JOY" and as I do love those bars, I knew I had to try this recipe.   Although there are so few ingredients in it that there is not much really to change, I did make a faster chocolate mix that keeps this more simple and faster.   And in a smaller form, I find them perfect for the Christmas season to decorate a plate to share with others. 

Although it is a short, simple word of three letters, Joy is not so simple to define.  For me, the word really does make me smile, it is not defined as happiness, and it stirs something  life-giving deep within me.  However you might define it, my hope is that by making these and sharing with others, they will extend life and a sense of Joy.

Joy Tarts
(makes 36 mini tarts)

1 1/2 cups unsweetened coconut (medium shred)
1/2 cup coconut oil * (virgin organic and cold-pressed coconut oil is my preference)
1/4 cup liquid honey  (prefer raw honey)
1 tsp almond extract

36 whole almonds - toasted
1 cup semi-sweet chocolate chips
1- 2 Tbsp coconut oil
* See Cook's notes below

On very low heat, melt the coconut oil and honey as desired.  Coconut oil is firm and white colored at room temperature but will melt and turn clear on a warm summer day or just in the palm of your hand.  I would recommend using a slightly warm oven (with the coconut oil in a glass bowl), or a low heat on a stove top to liquefy the coconut oil.  No cooking is necessary and strongly discouraged to keep the nutritional value high as high as possible in the oil and honey.


 Add the extract and coconut and stir to combine.  It may appear as if there is not enough liquid but it does work.


Using a mini muffin pan, scoop about 1 - 2 tsp of coconut mixture into each cup.  Again, it will not look like much is there but it is plenty when you bite into them.  You may want to press down with your spoon on the tops of the tart to smooth out the surface.  Chill the tarts in a freezer for about 20 minutes.


While that is chilling, toast the whole almonds.  I put my nuts in a toaster oven and just heat them on a low heat for a couple of minutes - stirring in between.  If you don't have one, use a small skillet on the oven top (with medium heat) and stir the almonds until lightly fragrant and toasted.  Set aside to cool.


Then melt the chocolate chips and coconut oil in a double-boiler or using the microwave if you prefer.

Remove the coconut tarts from the freezer.  Pour a small amount of melted chocolate on each tart and top with a whole almond.


Return the tarts to the freezer for another 15 - 20 minutes.  Once they are solid, they pop out of the pan pretty easy using a butter knife or nylon tool suitable for your mini muffin pan.

Best to store the tarts in the freezer.  I enjoy them best while they are served cold - even right from the freezer!


Cook's Notes:
Coconut Oil
This oil is definitely a healthy one found in health stores and health food section of major grocery stores.    Like most things, you get what you pay for with coconut oil.  I would suggest finding something virgin, organic and cold-pressed for the most nutritional value.  If you are not a fan of the coconut flavour (you likely won't be making these then) you can buy cheaper options as they often taste like nothing but they won't have the same nutritional value. 
Of the examples pictured, the Nutiva is (found at the Bulk Barn) is and is great overall option at a fair price.  The black container (bought at Zehrs) has no coconut flavour and was cheaper.  The left-side option was the best flavour and most expensive too.  Choose what works best for your needs and budget. 

The beauty of coconut oil is it is solid at room temp but will melt on a warm summer day or with the warmth of your hand. In this recipe, it helps the tart to stay solid and firm providing they do not get too warm.
In addition to using it in cooking/baking (in place of butter or oil), coconut oil is overall a wonderful oil to use for any skin irritations, dry skin, dry lips - either applied topically or eaten by the spoonful. When your jar is running low, be sure to save the little bits left for your skin needs.

Sunday, February 20, 2011

Chocolate Nut Truffles


Here is a wonderful treat that is entirely naturally sweet!
Just blend it all together
and roll it into balls
and you have something delicious and "raw"
that sugar just can't beat!

Be sure to try out both the Chocolate
 AND Peanut butter versions!


The chocolate truffle recipe was taken from the 8Week Challenge Participants Guide (Chocolate Date Balls).


Chocolate Nut Truffles

1 cup packed Dates*
2 ½ cups walnuts
½ cup cocoa powder
½ cup unsweetened coconut* - toasted
* See Cook's Notes below.

Stuff your dates into a 1 cup measure.  Really pack them down.  
 
Using a food processor (mine is 14 cup) place the dates inside and process.  Add the walnuts and process again until they are as small as you can get. Scrape down the sides as necessary.  Add the cocoa and coconut and blend until a small crumb size is obtained.


Using a small cookie scoop of 1 Tbsp, drop the dough onto a cookie sheet.

Then press the dough into a ball with your hands to keep it from falling apart.

 Chill or freeze until eaten. Makes about 34 small balls that are DELICIOUS!!!

Peanut Butter Nut Truffles
1 cup packed dates *
2 cups walnuts
½ cup natural peanut butter

½ cup peanuts
½ cup unsweetened coconut
* see Cook's Notes below


Follow the directions as written above.  Makes about 40 truffles. 

Cook's Notes
Packed Dates:  The key to making this recipe easy is moist dates.  I buy my dates in bulk and sometimes they can be dry.  After measuring out the 1 cup of dates, I pour hot water over my dates prior to blending and allow them to soak for 1- 2 minutes.  Drain the water off and then process the dates.  The mixture sticks together much better.
Unsweetened Coconut: I just tried toasting the coconut before adding it and "WOW" ! It tastes fabulous.  It adds a new dimension of flavour, and a little more crunch.  To toast your coconut, use a small frying pan and stir as it warms.  It will brown quickly.  I do mine in my toaster oven which basically broils like an oven.


Enjoy with a hot tea or coffee and friends of course!


Monday, September 20, 2010

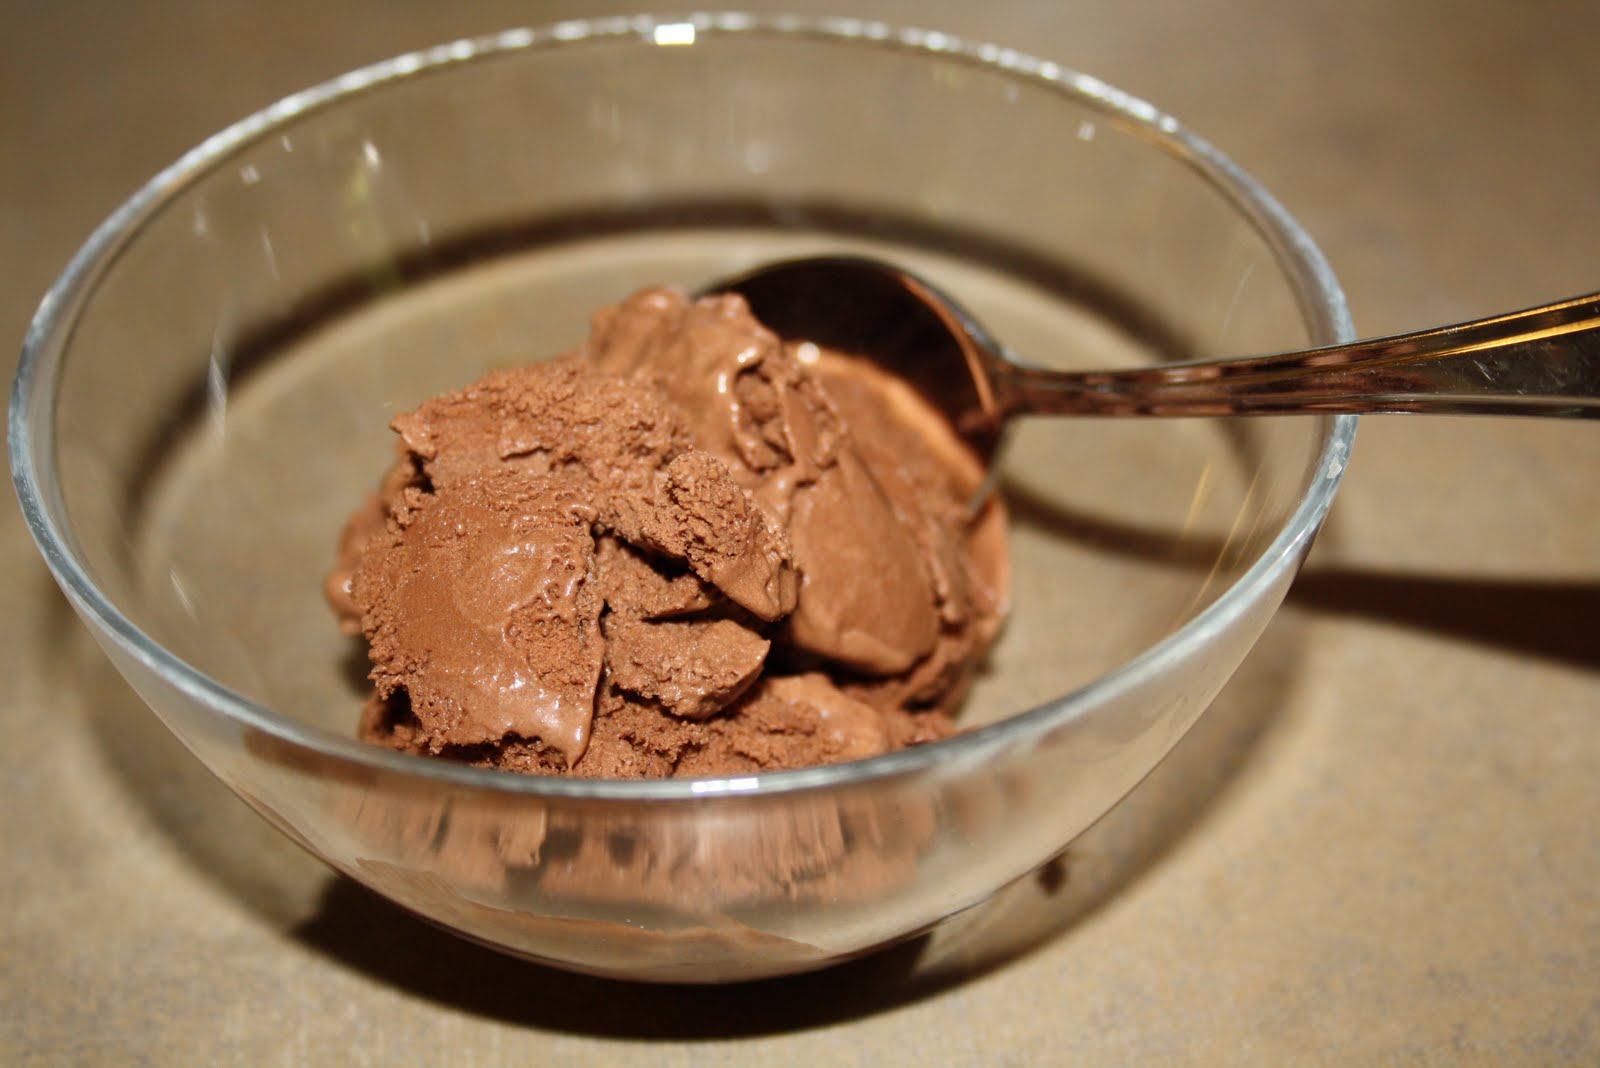
Chocolate Coconut Milk Ice Cream

I love to enjoy ice cream...any time of the year.  So when I was told to remove all dairy from my child's diet, I had the dilemma of how to enjoy ice cream without her being left out (she also loves ice cream!).  And while you can find dairy-free ice cream in the store, the cost for the size was just too much - and still loaded with sugar.  Then I came across this recipe.  The recipe came from a website so to be fair to all, I will only post the few simple ingredients but leave you with the website link so you can check it out. Really worth a try. Super simple,  very delicious and really cheap to make compared to buying dairy-free options. And if you don't have an ice cream maker, don't stop reading here.  See the cook's notes below for an alternate ideas.


Chocolate Coconut Milk Ice Cream

Coconut Milk
Cocoa powder
Agave nectar *
Vanilla extract
Ice cream maker*
* = see cook's notes below


www.thenourishinggourmet.com/2008/05/chocolate-coconut-milk-ice-cream-2.html


I am such a lover of ice cream – no matter what the season is. This one ranks pretty high for me in the like department. Especially since it is simple and cheap.


Cook's Notes:
Toasted Coconut: I personally enjoyed adding toasted Unsweetened coconut on top of my ice cream.  Does that not look delicious?!  If you have never toasted coconut before, use a frying pan on medium heat and stir until it is lightly browned.  Do not add any oil or butter, just dry coconut.  I do mine in my toaster oven - just faster.  Just be sure to watch it closely cause it can burn quickly once it is heated.
 
Agave Nectar: This is a more natural, sweet syrup that can replace sugars and has an extremely low Glycemic Index (it does not impact your blood sugar very much).  I buy mine in the Health-food Section of the Zehrs store.  It is a costly bottle, however good to have on hand for certain foods that apple butter may not work well for.  Other options to use would include maple syrup or honey if you prefer.

Ice Cream Maker: So here are some options...
1. If you don't have one, check with a friend who might have one that you could borrow.  If you don't have a "borrow-from friend", you should find one of those too!  I love mine!
2. If you love ice cream and have always wanted one, try buying it second-hand.  I got mine off of kijiji and it was used once.  Many people get them as gifts I guess and never use them.
3.  You can always go big and buy a new one.  Perhaps you know you will make good use of one that is new.
4. The other option is to make the ice cream and just put the bowl in the freezer.  Stir it every half hour or so until it is slushy/frosty-like.  This may take several hours.  It is not the same as a maker but better than never having tried a recipe as such. 

Thursday, August 5, 2010

Black Bean Brownies

Here is a brownie recipe that serves up great chocolate taste, not too sweet, yet fudgy texture along with a shocking surprise for your guests – yes, it really has a can of beans in it! I created my version of the recipe after being influenced by other recipes I found in my cookbook collection. Seems I can hardly ever follow a recipe as noted by anyone any more. Hope this one works for you or if you are like me….may it inspire your own creativity to make one to call your own!  BTW...if you have never tried a brownie like this, it is truly worth it.


Black Bean Brownies
1 (19 oz) can of black beans – thoroughly rinsed and drained
¾ cup butter – melted *
1 cup walnuts (used as separate ½ cup measures) – toasted
½ cup unsweetened cocoa
¼ cup unsweetened applesauce
¼ cup natural coffee substitute *
½ tsp sea salt
1 Tbsp vanilla extract
¾ cup apple butter *
4 eggs

Notes for Success on this:
  • This recipe is completely mixed in a 14-cup food processor. If you only have a smaller food processor, make sure you puree the beans and nuts in smaller portions and then use a bowl and hand mixer for the remaining mixing.
  • Puree the beans and nuts to as smooth a texture as possible before adding too much liquid.
  • "Blend” and “Puree” are the same setting on my machine. The difference is pureeing is to take something whole and making it basically a paste (takes longer to mix) and blending is simply to mix several ingredients together (shorter time to mix).
  • Times noted for blending are approximate. I never time them but the idea is to have it well blended and smooth.
  • Please do not serve the brownies warm or from the oven as the bean flavour is strongest then. They store nicely in the freezer and are quick to thaw for serving cold.
Preheat the oven to 325F.

Using a food processor, add the black beans and puree for about 45 seconds. Add the melted butter and process for 1 – 2 minutes or until as smooth looking as possible. Add the ½ cup of walnuts and puree for another minute.

Add in the cocoa powder, the applesauce, salt and vanilla. Before adding in the coffee substitute, first add 1 – 2 Tbsp of water to the coffee granules to dissolve them in a separate bowl and then add to the food processor along with the apple butter. Blend for another minute. Add the eggs and blend the mixture for another minute or so.

Line an 11x15 baking pan with parchment paper. Pour the batter into the pan.

Sprinkle the remaining ½ cup of toasted walnuts over the batter and gently tap them into/under the batter to cover them before baking.

Bake at 325 F for 20 – 25 minutes. (20 minutes makes a nice fudgy texture that we enjoy).  Cool completely before cutting.

Serve chilled and topped with plain yogurt and fresh fruit.

Cook's Notes:
Butter: If you find 3/4 cup too much, try decreasing the amount and increasing the applesauce(ie 1/2 cup butter and 1/2 cup applesauce).  I am not an official test kitchen and do not have time to just repeat baking to try all the small changes one could really make.  But the next time to do make this, I plan to try this combo myself.
Natural Coffee Substitute: I found this one at a bulk food store and it is 100% caffeine free.  It is made of roasted barley, rye, chicory, and beet roots.  It helps to mask the "beany" flavour.  You could always use other instant or strong coffee if you are not avoiding caffeine.
Apple butter: As always, my favorite choice is Wellesley brand.  If you do not have this available, you could use agave nectar or maple syrup as substitutes.  If in doubt, just email me and ask.
Baking Pan: If you do not have a pan 11x15 , feel free to try a 9x13 cake pan but add a bit more baking time...perhaps another 10 minutes.  I would not try a larger pan as the brownie is not very thick in a 11x15

Truly Delicious!


Wednesday, July 14, 2010

Amazing Chocolate Pudding

This has been my guilt-free pleasure this last week and it is time I shared it with you.  I really enjoy this funky version of chocolate pudding.  As you read the ingredients, I am sure you will cringe your nose and say "Is she out of her mind?".  No, I am not and I hope your curiosity will get you to try it too.  IF you are not a fan of chocolate and banana, chances are it will not be your favorite like mine, but it is still worth trying for nothing other than a great food story.

I need to give credit here where it is due.  I did not create this recipe...although I wish I had!  I heard of it via friends who purchased a cookbook called "Simply Balanced" put together by the team leading the 8 Week Challenge.  I believe the only change I made was removing the lemon juice.  I think it is ingenious how they recreate the mouth-feel of instant boxed pudding through the use of avocado and banana!  Who thinks of that?!?  Plus it is all healthy.


Amazing Chocolate Pudding


1 avocado *
1 banana (as ripe as you like them)
1/4 cup cocoa powder
1 Tbsp Applebutter (Wellesely brand is my favorite)
1 cup Rice Milk *
1 tsp Pure Vanilla Extract

Plain yogurt for topping*
Fresh fruit cut up for topping (peach and strawberry are my faves)
 

Place all ingredients in a food processor or use in a bowl with a hand processor and puree until smooth.  Chill for an hour or two. Before serving, be sure to top the pudding with yogurt and fresh fruit.
Makes approx 3 cups of pudding.


Cook's Notes:
Here is a great way to peel an avocado...cut the avocado in half and then in half again.  Instead of using a spoon to scoop it out, just peel the peel away.  It leaves you the most avocado and one less dirty utensil! 

Rice Milk is naturally sweet so it offers extra sweetness when used in this recipe.  If you choose a different type of milk (almond, soy or cow's milk), you may need to add a little extra apple butter to sweeten.
Be sure to dress up your dessert pudding with plain yogurt as it contrasts the chocolate flavour beautifully.  Sounds odd but the tartness of the yogurt works well with it.  Also lessens the flavour of banana as well.  Plus who does not love chocolate and fruit?  Fresh cut fruit is a must for us.

Sunday, January 24, 2010

Chocolate Carrot Cake - what better way to begin

After the dessert I made tonight, I knew the blog had to start now and with this recipe - Chocolate-Carrot Layer Cake with Chocolate Ganache Frosting. It inspires me to think outside traditional baking with new ingredients and olds ones used in new ways! So begins the journey with my food blog. Glad you have joined me.

Chocolate-Carrot Layer Cake with Chocolate Ganache Frosting
*slightly modified from Laurie Sadowski's recipe in the St. Catharines Standard January 2010

3 Tbsp ground flax
¾ cup warm water divided
3 cups grated carrots (about 5 carrots)
¾ cup agave nectar
½ cup unsweetened applesauce
2 Tbsp oil (safflower, canola)
1 Tbsp vanilla extract
1 ¾ cup spelt flour or gluten-free flour mixture
1 ½ tsp xanthan gum
½ cup cocoa powder
2 tsp baking powder
2 tsp cinnamon
¼ tsp nutmeg (optional)
½ tsp salt
1 cup non-dairy chocolate chips (I used regular)

Preheat oven to 350F. Lightly oil 2 – 9 inch round cake pans and lay down a coffee filter to help ease removal of the cake (or cut a circle from parchment paper).

In a small bowl, whisk together the flax with ½ cup warm water. The mixture will become thick and gel-like. This will replace the eggs in the cake recipe. Set aside.

In a larger mixing bowl, mix together the agave nectar, applesauce, oil, vanilla until well blended. Add in the flax mixture and combine thoroughly. Stir in the shredded carrots.
In another bowl, mix together the remaining ingredients.. Add the dry to the wet and mix until just combined. Gently stir in the final ¼ cup warm water.

Evenly divide the batter between the two cake pans and bake for 25 – 28 minutes or until an inserted toothpick comes out clean. Let the cakes cool about 10 minutes before removing them from the pans and cooling completely on a cooling rack. Don’t forget to remove the filter or parchment from the bottom of the cakes.
                                                          Frosting:
½ cup dates (packed) or date butter
1 tbsp vanilla extract
1 large avocado – peeled and pitted
½ cup cocoa powder
4 oz cream cheese (optional)
warm water


Soak the dates in the warm/hot water to soften them (15 minutes or until soft). Puree the dates in a food processor using the date water to create a date butter. Add remaining ingredients and process until the mixture is smooth. Add in the cream cheese for a milder flavour and it helps to create more icing cause you can never have too much!
Once the cakes have cooled, frost generously and enjoy!!!


What would I do different?
I likely would not bother using flax and water and just use eggs unless it was for someone who had egg allergies or was vegan.  It just removes a step and extra dishes.
I may try using just agave nectar instead of the date butter for the icing. While I do like dates, it does have a bit of a date taste.

Rating: 5 - Star
For a dessert of this nature and texture, and the fact that there is no sugar, I have to give it a 5-Star.