Egg meals. We have them frequently, alternating between breakfast, lunch and suppers because they are so healthy, fast and easy. Also a perfect option for when the weather is hot too. But I do get tired of just the regular "Fried Egg".
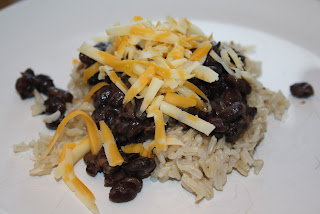
This version I enjoy most for suppers as it feels more like a "meal". With a little planning ahead, it is very quick too. The fastest version involves using leftover rice and canned beans with eggs and toppings. The longer option - you can cook your own black beans, make fresh rice and top with eggs and fresh toppings. Either way, this meal has more bulk than just eggs and toast and lots of FABULOUS COLOR on the plate. I am coming to realize I really enjoy my food more when there is lots of color to it. Doesn't that look more delicious below than just the eggs above!?!?!
Friends who have travelled to South American countries have told me that rice with beans and eggs is very common in many places down south...I just have not been to those places yet. This is my version of Mexican Eggs as inspired by chef Jose who sells something similar at the Market Square in St. Catharines - his is not as colorful!
Mexican Eggs
(To make 4 servings)
2 - 3 cups of cooked brown rice
1 cup dried black beans* or 1-19oz can of beans
8 - 12 eggs
1 cup Cheese of your choice* - shredded
1 Tomato - diced
1/4 - 1/2 cup fresh cilantro* - finely chopped
Salt and pepper to taste
*see Cook's Notes below
Using brown rice (long grain, basmati or jasmine are common finds), cook the rice according to the directions, or use leftovers.
Canned black beans should be thoroughly rinsed. Add them to a small pot with a little water and salt and pepper if desired and cook until they are heated through. See cook's notes below for directions on cooking them from dry beans. If you have never tried cooking your own beans, you should give it a try.
Cook your eggs according to your own preference. We all prefer this dish with our eggs sunny-side up or over-easy so the yolks are runny.
To assemble, place a serving of warm rice on a plate. Top it with the black beans, cheese, followed by the eggs on top (to melt the cheese), then the chopped tomato and cilantro. Enjoy!
Cook's Notes:
Black Beans: If using dried beans, it is super simple to make them up for eating with this dish, it just requires planning ahead. Soak 1 cup of beans in about 4 cups of water for 24 hours. If you think of it, rinse and add fresh water once throughout that time. After 24 hours, drain and rinse the beans with fresh water. Add the beans and enough water to cover them in a medium pot, along with a small onion roughly chopped. I read somewhere once that you should not add salt while they cook as that makes the beans hard...so I don't add salt at this point. Cook the beans over low-med heat for 2 - 3 hours. Towards the end of that cooking time, I add some sea salt to taste. Add more water if necessary through the cooking time. Remove the onion and serve the beans (or rinse first before serving if you prefer but I kinda like that liquid and flavour).
Cheese: Feel free to experiment with the cheese here. The perfect option would be Queso (Mexican cheese) but I don't know a good source that is local here. I have heard Feta is a close option to that, or you can always stay American and go with marble or cheddar. Whatever you choose, just shred it or crumble it up.
Cilantro: This is a herb that people either love or don't like it so much. I really enjoy it and put it in most of my food. If you are not so much of a fan, you can try fresh parsley as well.
When purchasing cilantro, try to always buy it with the roots intact. Although it is often dirtier, your cilantro will last much longer if the roots are intact. And it should have a crisp feel to it and stand up straight - not be gimpy and wilted.
To store it, wash it to remove all the soil hiding inside the stems, and then put it in a container (I use a plastic container as seen here only it holds parsley) with water to cover the roots and more water if needed to keep the container from tipping over. I try to let it sit on the counter for a couple of hours this way to allow the leaves to dry. Then I cover the tops loosely with a plastic bag (usually the one I just bought it in). It will keep this way in your fridge for a good 10 days and longer if it is not too crowded in the container. Changing the water every 3 - 4 days also helps if you can remember to do it.
To use it, you can finely chop it on a cutting board with a knife. Very chef-life and fun. In a pinch though, I also like to cut off what I want, put it in a small bowl and go at it with a kitchen scissor until it is all cut up finely. Just my suggestions.
Cooks' Notes:


