Thursday, December 16, 2010

Pizza that is still good for you!


I feel I have been holding back a golden gem - and that is my pizza crust made with spelt flour.  Having just made it again this weekend, I was totally blown away with how spectacular the pizza tasted and my family agreed.  I load ours up full of veggies and home-made sauce too so it still classifies as a healthy meal to enjoy.  And yes, it does have cheese but a mix of mozza and Sheep Feta.  Mmmm...I could eat this every day!  Hope you enjoy it as much as we do.

The Foundation: Spelt Crust
This recipe was influenced from "Benefit of the Dough" in Eat, Shrink and Be Merry.
1 1/2 cups spelt flour (plus more for rolling out the dough)
1/2 tsp xanthan gum*
½ tsp salt
2 Tbsp ground flax
2 1/4 tsp instant yeast (or one packaged envelope)
2/3 cup warm water
1 Tbsp Olive Oil
1-2 Tbsp cornmeal (optional but recommended)*


Combine the first 5 dry ingredients in a glass bowl and mix well. Create a hole in the middle of the dry mixture right to the bottom of the bowl and add in the water and oil. Knead the dough a few minutes by hand or stir as much as possible. Allow the dough to rest and rise for about 20 minutes or more in a warm place. I often will let mine sit for an hour or more and it is still great.  For my “warm place”, I preheat my oven slightly to warm it up, turn the oven off and then leave the light on (keep it warm) and place the dough inside.


Makes a great crust for a pan measuring 10 x 15 inches. If using the cornmeal, sprinkle it on your pan before rolling out the crust. Roll out the dough directly into the pan on top of the cornmeal using extra flour as needed.

For rolling on the counter: you will definitely need extra flour as the dough is very sticky. Once rolled out, put the cornmeal on the pan and lay the dough on top.
Pre-bake the dough undressed for about 10 minutes at 400F to ensure no soggy crust.

Once it has baked, you could allow it to cool and freeze it for future use. Otherwise, load it up with your sauce and toppings and bake again for 8 – 10 minutes.

The Middle Sauce:
1- 5oz can tomato paste (make sure no sugar is added in the paste)
5 oz water (just fill the can previously holding the paste)
1 tsp oregano
1 tsp basil
3/4 tsp salt
1 clove garlic - crushed
1/2 tsp pepper
Mix all the ingredients in a bowl and layer on pizza.

The Top Stuff:
Our pizza usually contains a combination of the following: Artichokes, zucchini, pepper, sun dried tomatoes, tomatoes, olives, red onion, chicken, feta, and mozzarella.


Cook’s notes:
Xanthan Gum: This ingredient is key to making a stronger dough as it creates a glutenous property to the dough. You can make this dough without the xanthan but the crust will be more crumbly and softer. With the Xanthan gum, you get a fabulous crust every time!  I purchase Xanthan at a bulk food store or health section of a larger grocery store.

Cornmeal: this little bit of cornmeal at the bottom of the pan helps your crust to bake better from the bottom. It actually allows the hot air to flow between the dough and the pan allowing the crust to crisp up better than without. Worth a try and super cheap to buy.

Rolling out the dough: I do this right in my baking pan which is a Pampered Chef Large Bar Pan. Why not save a step and have less to clean up.


Monday, September 20, 2010

Chocolate Coconut Milk Ice Cream

I love to enjoy ice cream...any time of the year.  So when I was told to remove all dairy from my child's diet, I had the dilemma of how to enjoy ice cream without her being left out (she also loves ice cream!).  And while you can find dairy-free ice cream in the store, the cost for the size was just too much - and still loaded with sugar.  Then I came across this recipe.  The recipe came from a website so to be fair to all, I will only post the few simple ingredients but leave you with the website link so you can check it out. Really worth a try. Super simple,  very delicious and really cheap to make compared to buying dairy-free options. And if you don't have an ice cream maker, don't stop reading here.  See the cook's notes below for an alternate ideas.


Chocolate Coconut Milk Ice Cream

Coconut Milk
Cocoa powder
Agave nectar *
Vanilla extract
Ice cream maker*
* = see cook's notes below


www.thenourishinggourmet.com/2008/05/chocolate-coconut-milk-ice-cream-2.html


I am such a lover of ice cream – no matter what the season is. This one ranks pretty high for me in the like department. Especially since it is simple and cheap.


Cook's Notes:
Toasted Coconut: I personally enjoyed adding toasted Unsweetened coconut on top of my ice cream.  Does that not look delicious?!  If you have never toasted coconut before, use a frying pan on medium heat and stir until it is lightly browned.  Do not add any oil or butter, just dry coconut.  I do mine in my toaster oven - just faster.  Just be sure to watch it closely cause it can burn quickly once it is heated.
 
Agave Nectar: This is a more natural, sweet syrup that can replace sugars and has an extremely low Glycemic Index (it does not impact your blood sugar very much).  I buy mine in the Health-food Section of the Zehrs store.  It is a costly bottle, however good to have on hand for certain foods that apple butter may not work well for.  Other options to use would include maple syrup or honey if you prefer.

Ice Cream Maker: So here are some options...
1. If you don't have one, check with a friend who might have one that you could borrow.  If you don't have a "borrow-from friend", you should find one of those too!  I love mine!
2. If you love ice cream and have always wanted one, try buying it second-hand.  I got mine off of kijiji and it was used once.  Many people get them as gifts I guess and never use them.
3.  You can always go big and buy a new one.  Perhaps you know you will make good use of one that is new.
4. The other option is to make the ice cream and just put the bowl in the freezer.  Stir it every half hour or so until it is slushy/frosty-like.  This may take several hours.  It is not the same as a maker but better than never having tried a recipe as such. 

Tuesday, September 7, 2010

Leftover Salad for two!

The other night I needed supper, but had nothing planned as I was not supposed to be home for supper.  So I looked around my fridge and with the leftovers there, put together this wonderful salad!  So fresh, simple and a little Mexican!  Who does not love Mexican?!  I also really really like the dressing - creamy, sweet and a little spicy!  Great on many other salads as well.  Be sure to read the Cook's notes for other ideas on foods you could add in.


Mexican Fridge Salad


Dressing:
2 tbsp plain yogurt
1 tsp apple butter *
1/8 - 1/4  tsp cumin
juice of half lime (2 - 3 tsp)

Salad:
1 cooked cob of corn *
1 breast of Cooked/BBQ'd Chicken - cut into bite-size pieces
1/2 tomato - diced
1/2 avocado - peeled and diced
corn chips - preferable blue for best color contrast
Fresh Cilantro


In a small bowl, mix together the yogurt, apple butter cumin and lime juice and set aside.
In another bowl, combine the corn, chicken, tomato, avocado and plate it as a salad.  Top with corn chips, cilantro and drizzle/spoon the dressing over. 

This serves 1 - 2 people depending on your appetite and whether lunch, supper or a late-night snack.  To make for a bigger family/group, just add more of the things you like and double, triple or quadruple the dressing.


Cook's Notes:
Apple Butter: I always have the Wellesley Apple Butter in my fridge but recognize not all of you will or may have access to buy it.  In place of Apple butter, you could also try pure maple syrup or naturally sweetened apricot jam. 
Cob Corn: I happen to save leftover, uneaten corn cobs because they work great for add-ins to meals like this.  You could always use frozen corn kernels as well but perhaps let it thaw so you don't have frozen bites in the salad.
Other add-ins: Here are some other ideas of things you can add in to increase the amount of salad you have - rice, beans of any sort, peppers, jalapenos, jicama (a sweet Mexican potato), cucumber...be creative and empty the fridge!

Wednesday, August 25, 2010

Lentil Soup - for all seasons

 I made this soup the other day because I needed a quick and easy soup.  Even though it is hardly "hearty soup season",  it was still so delicious and so worth sharing.  Please don't wait till fall to give this one a try!

This recipe was passed on from my mother in-law and I "tweaked" it ever so slightly to suite my cooking style.


Lentil Soup


1 Tbsp Olive oil
1 medium onion - chopped finely
1 clove garlic
2 stalks celery - chopped finely
2 carrots - chopped finely
1 red pepper (or any color of your choosing) - chopped finely
1 1/2 cups red lentils
2 tsp cumin
1 tsp coriander
1 tsp paprika
1/2 tsp sea salt
5 cups chicken broth or stock *
2 Bay leaves
1/2 lemon - juiced (about 2 Tbsp)*
1/2 cup fresh cilantro - chopped finely


In a 4 quart pot, heat the oil and add the onions.  Saute the onions for a few minutes.  Add the garlic, celery, carrots and pepper.  Continue to saute for about 5 minutes - or more.  This process of "sweating" the veggies brings out a richer flavour providing you are not burning the veggies.  Add the seasonings and lentils.  Stir for a minute to infuse the flavours. 

Add the stock and bay leaves and bring the soup to a boil.  Once boiling, turn the heat down to a simmer and allow it to simmer for  20 - 30 minutes.  If you have the time, I would suggest simmering for a longer period (like 2 hours).

Just before serving, add in the lemon juice, cilantro and remove the bay leaves. We  like this soup served both hot and cold.  Try it and see what you prefer.


Cook's notes:
Finely chopped vegetables: My preference in a soup like this is to have all the veggies similar in size and in this case, that is dictated by the smaller lentil size.  They do not have to be tiny, but I prefer to cut my carrots in 4strips and then slice them to get quarter pieces rather than round coins.  You get the idea.

Chicken Broth: There is a chicken broth I found that is made without any sugars - yes, most chicken broth has added sugar. The problem for me is it is quite a bit more expensive so I opt for a cheaper, organic one that does have a bit of organic sugar.  A choice dictated by cost.  I do make my own stock as well without any sugars, but I typically save that process for fall/winter.  The store brand I like now is Pacific Foods Organic Chicken Broth purchased at Costco.

Stock vs Broth: Stock is made using bones and broth uses only meat.  Stock is usually "jelly-like" from the bone.  Either one are fine for soup but I would expect the stock has a deeper, richer flavour.  Maybe I will have to make my own to compare one day.
About the 5 cups...Most store-sold broths are 4 cups so this technically means opening two and having leftover broth.  So options are to add 4 cups broth and 1 cup water or you could try 1 cup apple juice in place of the water idea as well.  If you open the second carton of broth, consider freezing it for later use - just be sure to measure it and label the amount so you know exactly how much you have.

Lemon:  It may seem quite strange to add lemon juice at the end but I am learning that lemon juice "brightens" the flavour of many foods, including this soup.  I have left it out and thought it was fine but then added it in and wow!  I will add it from now on.   A"seasoned" chef once told me real lemon juice does not come out of a bottle.  Fresh really is best.

Friday, August 20, 2010

Apple Curry Grilled Chicken

Here is a recipe I have made over and over and over again.  And given the BBQ season is still going strong, I hope you will give it a try and enjoy it like we do.  Our favorite meal includes this marinade on chicken with grilled veggies, brown Basmati rice and grilled pineapple.  This sauce would also work wonders on pork chops, pork loin or even add a new zip to hamburgers.

This recipe is influenced by a favorite cookbook: Crazy Plates - Grill of a Lifetime

Apple Curry
Grilled Chicken


1 - 1 1/2 lbs boneless, skinless chicken breasts
1/3 cup apple butter - Wellesley brand
2 Tbsp freshly squeezed lemon juice
1 Tbsp Bragg Liquid Soy Seasoning*
1 tsp curry powder
1/2 tsp cumin
1/4 - 1/2 cup unsweetened apple juice or applesauce (to thin out the sauce for eating)
* See Cook's notes


Mix all the ingredients together except the apple juice/sauce.  If you would like to marinade the meat, pour about 2 - 3 Tbsp of sauce over the chicken breasts to marinade for 30 minutes or more.    Use some extra sauce to baste the meat when grilling.  The other option we have been doing is to use olive oil and salt and pepper on the chicken to grill it and use the marinade like BBQ sauce, just add it as it finishes grilling.

With the extra marinade (that has not been in contact with raw meat), add about 1/4 - 1/2 cup applesauce or a Tbsp or two of apple juice to thin out the sauce and lessen the intensity.  Warm this on the stove top or in the microwave and use to add to the grilled chicken (and rice if you are serving it).


Cook's notes:
Bragg's Liquid Soy Seasoning is like Soy Sauce only much better for your body than Soy Sauce.  It is simply soy protein from soybeans and water and tastes like the soy sauce.  Another similar option to buy is also Tamarind Sauce.  One person once explained the difference between them like this: what pure maple syrup is to Aunt Jamima is what Bragg's Liquid Soy Sauce(or Tamarind sauce) is to Soy Sauce.  Yes, it is a little more expensive but most things that are better for you do cost more.  You can find it in the Health Food section of your grocery store.

Thursday, August 5, 2010

Black Bean Brownies

Here is a brownie recipe that serves up great chocolate taste, not too sweet, yet fudgy texture along with a shocking surprise for your guests – yes, it really has a can of beans in it! I created my version of the recipe after being influenced by other recipes I found in my cookbook collection. Seems I can hardly ever follow a recipe as noted by anyone any more. Hope this one works for you or if you are like me….may it inspire your own creativity to make one to call your own!  BTW...if you have never tried a brownie like this, it is truly worth it.


Black Bean Brownies
1 (19 oz) can of black beans – thoroughly rinsed and drained
¾ cup butter – melted *
1 cup walnuts (used as separate ½ cup measures) – toasted
½ cup unsweetened cocoa
¼ cup unsweetened applesauce
¼ cup natural coffee substitute *
½ tsp sea salt
1 Tbsp vanilla extract
¾ cup apple butter *
4 eggs

Notes for Success on this:
  • This recipe is completely mixed in a 14-cup food processor. If you only have a smaller food processor, make sure you puree the beans and nuts in smaller portions and then use a bowl and hand mixer for the remaining mixing.
  • Puree the beans and nuts to as smooth a texture as possible before adding too much liquid.
  • "Blend” and “Puree” are the same setting on my machine. The difference is pureeing is to take something whole and making it basically a paste (takes longer to mix) and blending is simply to mix several ingredients together (shorter time to mix).
  • Times noted for blending are approximate. I never time them but the idea is to have it well blended and smooth.
  • Please do not serve the brownies warm or from the oven as the bean flavour is strongest then. They store nicely in the freezer and are quick to thaw for serving cold.
Preheat the oven to 325F.

Using a food processor, add the black beans and puree for about 45 seconds. Add the melted butter and process for 1 – 2 minutes or until as smooth looking as possible. Add the ½ cup of walnuts and puree for another minute.

Add in the cocoa powder, the applesauce, salt and vanilla. Before adding in the coffee substitute, first add 1 – 2 Tbsp of water to the coffee granules to dissolve them in a separate bowl and then add to the food processor along with the apple butter. Blend for another minute. Add the eggs and blend the mixture for another minute or so.

Line an 11x15 baking pan with parchment paper. Pour the batter into the pan.

Sprinkle the remaining ½ cup of toasted walnuts over the batter and gently tap them into/under the batter to cover them before baking.

Bake at 325 F for 20 – 25 minutes. (20 minutes makes a nice fudgy texture that we enjoy).  Cool completely before cutting.

Serve chilled and topped with plain yogurt and fresh fruit.

Cook's Notes:
Butter: If you find 3/4 cup too much, try decreasing the amount and increasing the applesauce(ie 1/2 cup butter and 1/2 cup applesauce).  I am not an official test kitchen and do not have time to just repeat baking to try all the small changes one could really make.  But the next time to do make this, I plan to try this combo myself.
Natural Coffee Substitute: I found this one at a bulk food store and it is 100% caffeine free.  It is made of roasted barley, rye, chicory, and beet roots.  It helps to mask the "beany" flavour.  You could always use other instant or strong coffee if you are not avoiding caffeine.
Apple butter: As always, my favorite choice is Wellesley brand.  If you do not have this available, you could use agave nectar or maple syrup as substitutes.  If in doubt, just email me and ask.
Baking Pan: If you do not have a pan 11x15 , feel free to try a 9x13 cake pan but add a bit more baking time...perhaps another 10 minutes.  I would not try a larger pan as the brownie is not very thick in a 11x15

Truly Delicious!


Wednesday, July 14, 2010

Amazing Chocolate Pudding

This has been my guilt-free pleasure this last week and it is time I shared it with you.  I really enjoy this funky version of chocolate pudding.  As you read the ingredients, I am sure you will cringe your nose and say "Is she out of her mind?".  No, I am not and I hope your curiosity will get you to try it too.  IF you are not a fan of chocolate and banana, chances are it will not be your favorite like mine, but it is still worth trying for nothing other than a great food story.

I need to give credit here where it is due.  I did not create this recipe...although I wish I had!  I heard of it via friends who purchased a cookbook called "Simply Balanced" put together by the team leading the 8 Week Challenge.  I believe the only change I made was removing the lemon juice.  I think it is ingenious how they recreate the mouth-feel of instant boxed pudding through the use of avocado and banana!  Who thinks of that?!?  Plus it is all healthy.


Amazing Chocolate Pudding


1 avocado *
1 banana (as ripe as you like them)
1/4 cup cocoa powder
1 Tbsp Applebutter (Wellesely brand is my favorite)
1 cup Rice Milk *
1 tsp Pure Vanilla Extract

Plain yogurt for topping*
Fresh fruit cut up for topping (peach and strawberry are my faves)
 

Place all ingredients in a food processor or use in a bowl with a hand processor and puree until smooth.  Chill for an hour or two. Before serving, be sure to top the pudding with yogurt and fresh fruit.
Makes approx 3 cups of pudding.


Cook's Notes:
Here is a great way to peel an avocado...cut the avocado in half and then in half again.  Instead of using a spoon to scoop it out, just peel the peel away.  It leaves you the most avocado and one less dirty utensil! 

Rice Milk is naturally sweet so it offers extra sweetness when used in this recipe.  If you choose a different type of milk (almond, soy or cow's milk), you may need to add a little extra apple butter to sweeten.
Be sure to dress up your dessert pudding with plain yogurt as it contrasts the chocolate flavour beautifully.  Sounds odd but the tartness of the yogurt works well with it.  Also lessens the flavour of banana as well.  Plus who does not love chocolate and fruit?  Fresh cut fruit is a must for us.

Wednesday, June 23, 2010

Naturally Sweet Ketchup

Let me start by saying I have mixed thoughts on making my own ketchup and if you think I have gone too far now, so be it.  I have heard of others making it from scratch and thought it was crazy to go to that extreme.  At this point in life, we really do not use much ketchup any more.  But with the BBQ season starting, it has become the base for some BBQ sauces I am attempting as well as some tomato sauces I am trying.  And given there is a LOT of sugar in just a little bit of ketchup (like almost 1 tsp of sugar in just 3 tsps of ketchup), I figured trying my own recipe was worth it .  AND to my surprise, and that of my many guinea pigs who have tried it, it is really good and really simple.  It actually tastes like a tomato-based condiment rather than just a sweet red sauce.  So I would encourage you to give it a try and taste and see what a difference homemade makes (Jenn's ketchup is on the right in the picture above).

Jenn's Naturally Sweet Ketchup

1-5.5 oz can of tomato paste*
1/4 cup pure maple syrup or apple butter*
1/2 cup water
1 Tbsp white vinegar
1/2 tsp sea salt
* = see cook's notes

Mix all the ingredients together and keep in the refrigerator until ready to use. Yields 1 3/4 cups of ketchup.

Cook's notes:
Make sure your tomato paste does not have added sugar in it.  READ the ingredient list, don't just look at the calorie label as tomatoes themselves offer natural sugar. 
If using maple syrup, please only pure maple syrup.  It will still raise your blood sugar so if that is a concern, you may prefer to use the apple butter (wellesley brand).  I don't have specifics on the glycemic index (GI) of the syrup vs apple butter but I know when doing the 8 week challenge, maple syrup was not allowed and apple butter was so I am assuming from that, the GI of apple butter is lower and therefore better for your body.  Your choice.  I have made both ketchup options and they don't really taste much different.
I don't know exactly how long this ketchup will last in your fridge because I usually have used mine up in a week or two.  Assuming it does not get contaminated from food/germs, it should last fairly long as the Heinz version does not have any preservatives either (other than a lot of sugar) and it lasts forever!

If you would like to know more about glycemic index, check out the link below.

http://www.whfoods.com/sitesearch.php

Sunday, June 13, 2010

Fast, Simple and Beautiful

Here is another recipe I have made frequently for my family and for many guests.  A friend Val served me a similar meal years ago and since then I have been adjusting it and now the final change was the sugar-free dressing choice. Thanks Val for that first meal!  This is seriously one of our favorites due to the beauty of colors, the taste and then the simplicity of making something spectacular!  Just look at that color - it certainly inspires me and I hope it will you too. 


Sundried-Tomato Chicken 
Pasta with Feta
3 cups uncooked Brown Rice Penne Pasta*
3 - 4 boneless, skinless chicken breasts *
1/2 red onion - diced
1 zucchini - diced
1 yellow pepper (or color of your choice) - diced
1 1/2 cups carrots -peeled and diced
1/4 - 1/3 cup Sundried Tomatoes* - cut into bite-sized pieces
1/4 - 1/2 cup Sundried Tomato dressing - Renee's brand *
1/2 cup Feta Cheese - crumbled
* = see Cook's notes below

Cook the pasta in a large pot of boiling, salted water according to directions.

Using a large skillet, heat the skillet and add 2 tbsp of  dressing and the diced chicken pieces.  Cook until the chicken is no longer pink and remove the meat from the skillet to cook the veggies.  Add another 2 - 3 Tbsp of the dressing and add the onions, peppers, zucchini and carrots and cook for another 5 - 7 minutes or until tender. 
 
Add the sundried tomato pieces, olives (if using) and return the meat to the pan.  Add more dressing if needed but it should not be dripping in the sauce.  Stir and cook until heated through. 
To serve, layer the pasta with the veggies and chicken and top with crumbled feta.

Cook's Notes:
Pasta: My preference for pasta is brown rice pasta.  I only cook mine for 7 minutes once the water boils and the pasta is added.  If you overcook your rice pasta, it will go mushy and tastes terrible.  Please check your brand directions and always use a timer!  Seriously...it is not worth ruined pasta.


Chicken: You have other options for chicken here.  It really tastes delicious and fancy to marinate the chicken breasts in the dressing (just enough to coat them) for an hour or more and then BBQ the chicken.  Slice the breasts and lay over the plate.  The other thing we do is buy sundried tomato chicken sausage and use that with this meal.  So take your pick.

Dressing:Renee's Gourmet Sundried Tomato and Black Olive dressing is one that contains no added sugars so it is all I buy.  You can find this in the cooler section of the produce department of larger grocery stores.  One could use other Sundried Tomato dressings or even Italian dressing in a pinch, but know it will likely contain sugars of some sort.  Read the ingredient list and remember dextrose is a sugar.  

Sundried Tomatoes: These can be purchased dry or in oil.  For obvious reasons, the dry ones are the healthier option and even in oil, some brands will add sugar as well.  If using the dry ones, they suggest soaking them in hot water for a few minutes before using.  I have done this water soaking but in a pinch, I have also used them without soaking them first.  Makes for a faster supper.  And for cutting up the tomatoes, don't forget you can use a scissor instead of a knife if you prefer.

Wednesday, June 2, 2010

Apple Walnut Spelt Bread

This recipe was first discovered thanks to the purchase of my Sunbeam breadmaker.  The recipe was in the recipe section of the manual - and then modified of course.  I love it because it is nice to dump into a machine and get this marvelous loaf along with the best-smelling house ever! I have no doubt it would also work the old-fashioned way if you don't have a breadmaker.  It does make a heavier bread but it is the best toasted with butter.  Great tea-time snack or breakfast!


Apple Walnut Spelt Bread


3/4 cup unsweetened applesauce
1/2 cup + 1 Tbsp unsweetened apple juice
1 tsp salt
3 Tbsp butter - melted
1 egg
1/4 cup applebutter
4 cups spelt flour
2 tsp xanthan gum
1 1/4 tsp cinnamon
1/2 tsp baking soda
1 tsp instant yeast
1/2 cup chopped walnuts


Add the applesauce, juice, salt, butter, egg and applebutter into the bread pan.  In a separate bowl, measure and add the flour, xanthan gum, cinnamon, baking bsoda and stir to combine thoroughly.  Pour this onto the liquids in the bread pan.  Sprinkle the yeast on top of the flour mixture.
Twist the bread pan into the breadmaker, close the lid and select the sweet bread setting (on my machine it is about 2 1/2 hours).  Select your crust color and press start.  When the dough is formed into a ball during the kneading cycle, raise the lid and sprinkle the nuts in (about 5 minutes into the cycle).  This does make a delicious 2lb loaf of bread.


Cook's Notes:
The recipe book does say this should not be made using the timer (ie placing it all in the pan and having it set to go on at a later time).  I have no idea why this would not work for a timer but I have not tried it yet.  I think I may have to though. Waking up to this bread would be a delight!
I would definitely consider adding raisins in and perhaps omit the nuts then.  Another option I have wanted to try is to add small pieces of apple in as well. Yum! 

Friday, May 28, 2010

A New Twist on Salsa


Here is a fantastic new salsa that is filled with healthy essential oils for your body in their most natural form - fresh olives and avocados!  Even for those who do not like olives, this is still worth trying because the combination of foods in each bite blend so well together, you may not know you are eating olives. It is perfect for any BBQ, party or even a lite lunch side.

This recipe was passed on by our good foodie friends, Hans and Carolyn!  Thanks so much.  I am so glad I had the pleasure to enjoy and share this one.

Avocado Salsa

1 ½ cups kernel corn * 
1 ½ cups olives (kalamata or black) - sliced
1 cup red pepper – chopped finely
½ cup red onion – chopped finely
3 cloves garlic – pressed/minced
¼ cup olive oil
¼ cup lemon juice – freshly squeezed
3 Tbsp apple cider vinegar
1 tsp dried oregano
½ tsp salt and pepper
3 avocados – diced *
Blue or White Corn Tortilla chips *

* Check the Cook's notes below for more details.

 In preparing your veggies, try to keep all of them similar in size - and small so you can get lots on your chip.  Using a large glass bowl, mix all the ingredients together except the avocado and refrigerate overnight or for several hours. Add the avocados just before serving. Enjoy with a bowl of tortilla chips - and friends too!!!
Cook's Notes:
Corn: Frozen kernel corn works really well as it is not milky and gimpy like canned corn is.
Lemon juice: As the famous Coco once said, "The only lemon juice you should use is that which you can freshly squeeze".
Avocados: Try not to use fully ripe ones as they will get mushy in the salsa.  To peel them, cut them in half and using a large spoon, scoop out the flesh.  To remove the pit from the one half, using a larger, sharp knife, place the edge of the blade into the pit and twist the knife until the pit is removed.
Tortilla Chips: We eat mostly the Blue corn tortillas because they are a bit better for you than the white corn (kinda like sweet potatoes are better than white potatoes).  I stay away from the multigrain because all those I have seen have added sugar in them...read the ingredient list.  I would rather avoid sugar and get my fibre from many other foods so I go with the blue ones (or white some days).


Thursday, May 20, 2010

Baked Oatmeal - the weekend is here!


When I first heard about this dish, I was skeptical.  It simply sounded a little strange.  I finally asked a friend for her recipe, made small changes, and we have been enjoying it ever since.   Since it is now a staple to signify "the weekend is here", I figured it was time to share it.  Give it a try - you know you want to.


Baked Oatmeal
* = see cook's notes below


2 cups Oats *
1 1/2 tsp baking powder
1/2 tsp cinnamon
1/2 cup walnuts or pecans - chopped and toasted
1 1/2 cups rice milk or milk of your choice *
1 tbsp applebutter or you could use maple syrup *
1 egg
1 egg white
1/2 cup unsweetened applesauce
1 tsp vanilla
1 tsp canola oil
Fresh fruit to add before eating

Preheat the oven to 350 F.
Combine the wet ingredients in a large bowl and whisk until the eggs are evenly mixed into the other ingredients.  Then add the oats, baking powder, cinnamon and nutsand stir.  Pour the batter into a large pie plate (10" or more) or a 9x9 cake pan or serving dish and bake for 25 - 30 minutes.  Allow it to sit for 10 minutes if you can wait.   Then slice and serve in a bowl with milk of your choice and fresh fruit.


 Cook's Notes:
Oats: I only use Old Fashioned Rolled Oats but you could use large flake.  Quick Oats would likely still work but may be a different texture.  Definitely do not use Minute Oats.

Milk: I like to use Rice Milk because it is naturally sweet (no added sugar) so it makes the dish sweeter without adding more sugars.  If you use regular milk, you may find you need to add more sweetness.

Applebutter options: if you do not have applebutter that is naturally quite sweet ( I only use Wellesley brand), you could use maple syrup in equal amounts.

Options to consider: I think this would be delicious with fruit added in before baking, like blueberries or raspberries or even sauted apples. 
I also found it worthwhile to mix up the recipe the night before and leave the it in the fridge.  I even set my oven to turn on automatically the following morning so I could be as lazy as possible - hey, it is the weekend!  So in the morning, all I have to do put the mixture in a room-temp baking dish and add it to the hot oven to bake.  During that time, why not get a little more sleep.  That sweet, warm cinnamon oat smell is a great thing to get your day going!!

Sunday, May 9, 2010

Spelt Tortillas


I have heard making tortillas was easy so I just had to give it a try. Plus I wanted fajitas for supper so it seemed like a good time. So here is what I did – I took a tortilla recipe and made it from spelt flour. And the results…so good I am a new believer in making my own tortillas, dare I say, all the time? I think my family might demand it now. Fairly basic so do give it a try and let me know what you think.


Spelt Tortillas


This recipe was adapted from : http://www.imagelicious.com/blog/post/homemade-tortillas
Yield: 12 6-inch tortillas

1 ½ cups spelt flour
½ tsp Xanthan gum
1 tsp sea salt
1 tsp baking powder
3 Tbsp butter – room temperature (could also use shortening if preferred)
2/3 cup warm water
extra flour for rolling out the dough ( I used regular white flour for some reason)


Mix the dry ingredients together in a bowl. Add in the butter and mix until a fine crumb forms. Add the water and stir to make a soft dough. Knead (or continue stirring) the dough for 1 – 2 minutes and then let it rest for 10 minutes.


On a floured surface, pour out the dough and divide it into 12 equal pieces. Using as much flour as needed to not have your dough stick, roll out each piece into a 6 inch tortilla (or as thin as you can handle). Dust off any excess flour before frying.


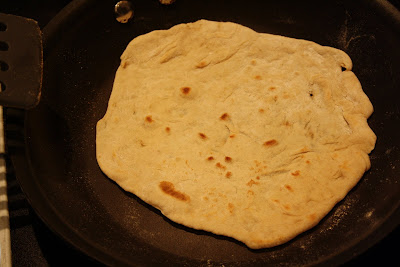
Heat a non-stick skillet on medium-high heat. With a non-stick skillet, there is no need to add any oil or butter for cooking. Once it is hot, cook each tortilla for about 1 – 2 minutes or until the dough bubbles and slightly browns. Flip and continue to cook for about another 30 seconds or until browned as desired. You may need to brush away excess browned flour from the pan before adding a new piece of dough.
                          
To reheat the tortillas, preheat an oven to 350 F. Wrap the tortillas in foil and place in the oven for 5 minutes.

Cook`s notes: Given it was my first time trying this, I only rolled one piece of dough at a time to ensure I had the right thickness and frying time. My plan is to spend some time making a lot ahead of time and freezing them so I am not making these AND supper to go in them at the same time.


If you don`t want or have spelt flour, this recipe can be done with regular or whole wheat flour and then you don`t need the xanthan gum either.


Rating: 5 star

My family devoured these fajitas...the tortillas made such a difference. So so much better than what we buy.
*special thanks to my husband for helping me make these!