Showing posts with label Vegan. Show all posts

Wednesday, February 26, 2014

One-Bowl Kale Salad

I love this new recipe that came from a friend in a quick discussion on what she was making for supper.  I often make this salad without measuring but for the sake of publishing it, I have found these amounts work well, but feel free to eye-ball it if you prefer.   I do find it is important to not make the dressing separate as is traditionally done with salads.  I personally think that the layering effect of the dressing helps create the balance of taste.  PLUS, that would require additional dishes to make it in a separate bowl.  I always prefer fewer dishes and it makes this salad recipe a little unique.


I first started making this salad in late winter/early spring when I could still get kale from my garden and oranges were in season.  As I harvested my new kale from the spring and summer, I had used fresh strawberries, apples, pears and I used those in place of the orange and loved that equally well.  So it is a salad for all seasons really....I am now buying my kale in the grocery store like most Canadians.

One-Bowl Kale Salad

4 cups Kale - finely chopped
1 orange - peeled and cut into bite-sized pieces (or fruit of choice)
2 Tbsp chopped almonds - toasted
1/4 cup fresh cilantro - chopped
1 Tbsp Olive oil
1 Tbsp fresh lemon juice
1 tsp maple syrup
salt and pepper to taste.


Wash the kale and chop into thinner strips or pieces.  Place in a medium-sized bowl.
Drizzle the olive oil over the kale and rub or massage the oil into the greens using your hands.  This may cause the kale to look more wilted which is totally ok.
Pour the freshly squeezed lemon juice over the kale and stir to spread the juice around.
Pour the maple syrup over the kale and stir to spread the sweetness =)
Season with salt and pepper and stir again to mix it all in.

If you want to present this salad on a plate, now is the best time to do that.  Pour the kale onto a plate/platter.  Evenly spread on the cilantro, the fruit of choice and finish with the nuts on top. This gives everyone equal access to all the yumminess in the salad.

If you prefer to mix it all in the bowl, add the remaining fruit, nuts, cilantro and stir everything together.
Enjoy!


Wednesday, February 5, 2014

Chocolate Marble Banana Bread

I found this recipe at a favourite blog of mine chocolate covered Katie but found her directions to be complicated and she had more sugar than I felt was needed.  So here is my version which simplifies the mixing process to keep life simpler and baking more fun.  It is totally delicious, vegan if you follow the specific ingredients, and so worth trying.


Chocolate Marble 
Banana Loaf
2 cups mashed banana (about 5 frozen bananas)*
1/2 cup pure Maple Syrup
1/4 cup Coconut oil - or oil of choice
2 Tbsp Rice milk (or any milk of choice)
1 - 2 tsp Vanilla extract
2 tsp cider vinegar or lemon juice
1 tsp baking soda
1 tsp baking powder
3/4 tsp sea salt
1/2 tsp cinnamon
2 cups spelt flour (whole or light spelt or any other alternative flour of choice)
*******************
3 Tbsp Cocoa powder
1 Tbsp Rice milk (or milk of choice)
1/4 - 1/2 cup chocolate chips

Preheat the oven to 350F.
Prepare a 5 x 9 loaf pan with parchment paper for easy removal of the loaf after.

In a large bowl, mash the bananas until a smooth consistency is obtained.
Then add the syrup, coconut oil, 2 Tbsp rice milk, vanilla and cider vinegar and mix thoroughly.
Add the soda, powder, salt, cinnamon and combine.
Add the spelt flour and gently mix it in.
Pour about half the batter into a smaller bowl and set that aside.
Using the larger bowl with half the batter, mix in the 1 Tbsp rice milk and cocoa and chocolate chips.
Stir until all combined.
Starting the with non-chocolate batter, pour half of that mixture into the loaf pan.  Use a spoon to spread it evenly across the bottom.
Pour the chocolate mixture over top the banana mix.
Finish off with the last portion of banana mix on top of the chocolate.  Use a spoon or knife to swirl the flavours together.

Bake in the oven for 50 minutes or until the centre is firm.  I sometimes turn off the oven after 50 minutes and will leave the loaf in the oven for an additional 10 minutes to finish off the baking more indirectly.

It is really delicious if you can wait for it to cool off before biting in.

Cook's notes:

Bananas: I personally always use frozen bananas for my baking.  I allow them to ripen on the counter (creating more natural sugars) and freeze them with the peel on.  To use for baking, I put the frozen bananas in a bowl with water for about 20 minutes to thaw them.  Discard that water and peel the bananas  - well it is more like cut the skin and squish out the sweet nectar.  They mash really easy this way and provide a great consistency for muffins and loaves like this.  If you use ripe bananas from your counter, the loaf consistency may change slightly.  You may need to add another 2 + Tbsp of milk to thin the batter a bit more.


Wednesday, July 10, 2013

Nature's Perfect Cake


This is the most simple cake idea ever - wish I had thought of it.  
No Gluten.  
No Sugar.  
No eggs.  
No dairy.  
Vegan.  
Raw.  
Organic if you choose.  
  
Turn your WATERMELON into a cake!!!  
Presentation is definitely the key to pulling this off - even on kids.  
I have used watermelon for dessert but cut it up in slices in a bowl and it was just watermelon.  
When you turn your watermelon into a cake shape (preferably a double-layer cake height), 
add some fruit "candies" and suddenly - You are eating a cake.  Really.   


Be creative.  Use whatever fruit you have to decorate and present it as a cake.  I had strawberries sliced up, blueberries, apple triangles and mint leaves.  The color of additional fruit really is important and vital for appeal and transfiguration.  Serve it up on a platter or cake stand, add the candles, sing and slice it like a cake.  Perfect for the world of food trends and diets and allergies.

A few suggestions:
Watermelon shape:  Try to buy the longest, more oblong shaped watermelon you can buy.  If long enough, cut off the curved ends so you can have a cake entirely flat and round-shaped.  You can see I had to use part of my curved end which made it a bit more dome-shaped but it did not alter the experience for us who enjoyed it..
Fruit "Candies": Don't use bananas unless the cake is eaten immediately.  Even with apples, make sure the variety does not brown quickly or use some lemon juice on them to keep them from browning.  Try grape halves, cantaloupe/honeydew balls or possibly use small cookie cutter shapes (ie stars, hearts, circles/rings) to cut larger surface fruit.


Tuesday, December 11, 2012

Joy Tarts

I have many things I should be doing right now like laundry, cleaning, making meals, but something in me needs to be creative and expressive...so blog it is.  I have been meaning to blog this recipe for some time and now seems the perfect day and space.  Joy Tarts! 

This recipe was first discovered from a favorite blog I follow but made as larger Mounds Candy Bar . The Canadian equivalent to the US Mounds is "Almond JOY" and as I do love those bars, I knew I had to try this recipe.   Although there are so few ingredients in it that there is not much really to change, I did make a faster chocolate mix that keeps this more simple and faster.   And in a smaller form, I find them perfect for the Christmas season to decorate a plate to share with others. 

Although it is a short, simple word of three letters, Joy is not so simple to define.  For me, the word really does make me smile, it is not defined as happiness, and it stirs something  life-giving deep within me.  However you might define it, my hope is that by making these and sharing with others, they will extend life and a sense of Joy.

Joy Tarts
(makes 36 mini tarts)

1 1/2 cups unsweetened coconut (medium shred)
1/2 cup coconut oil * (virgin organic and cold-pressed coconut oil is my preference)
1/4 cup liquid honey  (prefer raw honey)
1 tsp almond extract

36 whole almonds - toasted
1 cup semi-sweet chocolate chips
1- 2 Tbsp coconut oil
* See Cook's notes below

On very low heat, melt the coconut oil and honey as desired.  Coconut oil is firm and white colored at room temperature but will melt and turn clear on a warm summer day or just in the palm of your hand.  I would recommend using a slightly warm oven (with the coconut oil in a glass bowl), or a low heat on a stove top to liquefy the coconut oil.  No cooking is necessary and strongly discouraged to keep the nutritional value high as high as possible in the oil and honey.


 Add the extract and coconut and stir to combine.  It may appear as if there is not enough liquid but it does work.


Using a mini muffin pan, scoop about 1 - 2 tsp of coconut mixture into each cup.  Again, it will not look like much is there but it is plenty when you bite into them.  You may want to press down with your spoon on the tops of the tart to smooth out the surface.  Chill the tarts in a freezer for about 20 minutes.


While that is chilling, toast the whole almonds.  I put my nuts in a toaster oven and just heat them on a low heat for a couple of minutes - stirring in between.  If you don't have one, use a small skillet on the oven top (with medium heat) and stir the almonds until lightly fragrant and toasted.  Set aside to cool.


Then melt the chocolate chips and coconut oil in a double-boiler or using the microwave if you prefer.

Remove the coconut tarts from the freezer.  Pour a small amount of melted chocolate on each tart and top with a whole almond.


Return the tarts to the freezer for another 15 - 20 minutes.  Once they are solid, they pop out of the pan pretty easy using a butter knife or nylon tool suitable for your mini muffin pan.

Best to store the tarts in the freezer.  I enjoy them best while they are served cold - even right from the freezer!


Cook's Notes:
Coconut Oil
This oil is definitely a healthy one found in health stores and health food section of major grocery stores.    Like most things, you get what you pay for with coconut oil.  I would suggest finding something virgin, organic and cold-pressed for the most nutritional value.  If you are not a fan of the coconut flavour (you likely won't be making these then) you can buy cheaper options as they often taste like nothing but they won't have the same nutritional value. 
Of the examples pictured, the Nutiva is (found at the Bulk Barn) is and is great overall option at a fair price.  The black container (bought at Zehrs) has no coconut flavour and was cheaper.  The left-side option was the best flavour and most expensive too.  Choose what works best for your needs and budget. 

The beauty of coconut oil is it is solid at room temp but will melt on a warm summer day or with the warmth of your hand. In this recipe, it helps the tart to stay solid and firm providing they do not get too warm.
In addition to using it in cooking/baking (in place of butter or oil), coconut oil is overall a wonderful oil to use for any skin irritations, dry skin, dry lips - either applied topically or eaten by the spoonful. When your jar is running low, be sure to save the little bits left for your skin needs.

Monday, September 24, 2012

Pumpkin Coconut Loaf


A couple of years ago, my neighbour called me asking to borrow some coconut milk for a pumpkin loaf she wanted to make.  Coconut milk and pumpkin?  Yummy!  So after looking at the recipe as found on-line, I was even more intrigued as it also had no eggs in it either making it dairy-free and vegan!  That is not common in yummy baked goods!  So to make it family-friendly for us, I did swap out the flours and sugars and oils and the loaf is absolutely delicious  (as I am sure it is in the original recipe as well)!  So moist.  So yummy.  So PUMPKIN-PERFECT for fall!  You really must try it.

Pumpkin Coconut Loaf

1 3/4 cup Spelt flour
1 tsp baking soda
1/2 tsp sea salt
1 tsp cinnamon
1/2 tsp nutmeg (optional)
1 cup pumpkin puree *
1/4 cup oil (safflower, coconut, or oil of choice)
1/4 cup unsweetened applesauce
1/2 cup coconut milk or non-dairy milk *
3/4 cup palm sugar
1/2 cup unsweetened coconut
1/2 cup walnuts (optional)*

Preheat the oven to 350F.  Grease a 4"x8" loaf pan or line it with parchment paper.


In a large bowl, combine the dry ingredients (flour, soda, salt, cinnamon, coconut, and nutmeg if using).
In a smaller bowl, combine the pumpkin, oil/applesauce, coconut milk, and palm sugar (or whatever sweetener being used).  Mix well.  Pour this liquid mixture into the dry ingredients and stir gently until all is combined.  Pour into a prepared loaf pan (either lined with parchment or greased as required to easily remove the loaf).


Bake for 1 hour.  The original recipe says to bake for 1 hour and 15minutes but I found 1 hour was perfect.  Allow the loaf to cool for 5 - 10 minutes in the pan and then remove it and allow to cool on a cooling rack.  Enjoy!

This recipe is easily doubled to create two loaves if you prefer - one for yourself and one to give away!


Cook's Notes:
Pumpkin Puree
Canned pumpkin puree is fairly common and easy to buy and use for this recipe but you could also bake a fresh pumpkin and make your own pureed filling.  If looking for canned pumpkin, be sure to use Pumpkin Puree.  Pumpkin pie filling, the other canned pumpkin in the store,  has sugar and added spices you don't need in this recipe so you don't want to buy this for the recipe.

Coconut Milk
This milk is found in either cans or in tetra packs usually with other non-dairy milks.  Either is fine.  I have moved to buying the larger tetra pack coconut milk as I use it much more frequently in my foods. Leftovers coconut milk can be stored in the fridge for a few days and used in Thai foods or soups, or the extra frozen and thawed for later use.  If you don't have coconut milk, you could use another source of milk (dairy or non-dairy) in equal amounts.

Walnuts
I love nuts in any food I make, however, I do not like how it makes a loaf more difficult to slice.  So your choice.  I also like the "school-friendly" option without them.


Monday, May 30, 2011

Penanapple Wraps

My kids love to cook and so a month or two ago, I signed up for a free cooking class that all of us could do together.  Unfortunately, we had to cancel the class due to other events that had to happen on that same day. So in efforts to make up for it, the kids and I have been going through a fun kids cookbook to make more foods together in our own kitchen.  And today, we discovered this gem of a recipe.  So simple yet so different and refreshing AND completely naturally sweet.  (I have to admit I was a little surprised the recipe used a fruit for sweetness!) 
My kids loved helping to make these wraps and then loved eating them too!  What could be better for any parent who has kids to feed.  The only possible down-side to this creation is it contains peanut butter which means it cannot be sent to 99% of the schools for lunch (at least in our area).  But there are lunches on weekends and spring breaks and summers plus one could easily substitute any nut or seed butter for the peanut butter for those with allergies.  I hope you will give it a try - and with your kids if you have any.

We named the recipe "Penanapple Wraps" cause it is more fun but it was called "The Sky is Falling Apples! Wrap" from Disney's  The Magic Kitchen Cookbook. 


Penanapple Wraps
(Peanut butter banana apple wrap)


1/4 - 1/2 small banana
2 - 3 Tbsp natural peanut butter
1/2 apple - chopped into small pieces
2 - 3  8" whole wheat tortilla wraps (or wrap of choice)
* See the Cook's notes below for details on the recipe

Put your peanut butter in a small bowl for mixing.

Slice the banana into the bowl and mix or mash until it is as mixed as you like.


Cut the apple into small, bite-sized pieces.
Spread the peanut butter mixture over the surface of the wraps. Sprinkle the apple pieces over the top and roll up the wrap.

Slice as desired and enjoy!


Cook's Notes:


About the banana, you need the banana to add sweetness to the peanut butter so I would not use a green one but perhaps not too overripe either cause then the banana flavour is too strong.  So my thoughts are use a banana that you enjoy for just eating purposes.
About the measurements: Sorry I am not an "exact" cook when it comes to measuring ingredients in something like this.  I hate putting peanut butter in a spoon just to measure the amount so I just estimate.  Hope you are okay to go with it.  It can be made with more or less of everything to suit your needs.
About the Tortillas: I normally try to avoid wheat as much as possible.  And yes, I do have a spelt recipe to make tortillas on the blog but my real world does not allow me the luxury of time to have those on hand all the time.  So do what works for you.  When it comes to lunches, much easier to have some purchased tortillas on hand.


Sunday, February 20, 2011

Chocolate Nut Truffles


Here is a wonderful treat that is entirely naturally sweet!
Just blend it all together
and roll it into balls
and you have something delicious and "raw"
that sugar just can't beat!

Be sure to try out both the Chocolate
 AND Peanut butter versions!


The chocolate truffle recipe was taken from the 8Week Challenge Participants Guide (Chocolate Date Balls).


Chocolate Nut Truffles

1 cup packed Dates*
2 ½ cups walnuts
½ cup cocoa powder
½ cup unsweetened coconut* - toasted
* See Cook's Notes below.

Stuff your dates into a 1 cup measure.  Really pack them down.  
 
Using a food processor (mine is 14 cup) place the dates inside and process.  Add the walnuts and process again until they are as small as you can get. Scrape down the sides as necessary.  Add the cocoa and coconut and blend until a small crumb size is obtained.


Using a small cookie scoop of 1 Tbsp, drop the dough onto a cookie sheet.

Then press the dough into a ball with your hands to keep it from falling apart.

 Chill or freeze until eaten. Makes about 34 small balls that are DELICIOUS!!!

Peanut Butter Nut Truffles
1 cup packed dates *
2 cups walnuts
½ cup natural peanut butter

½ cup peanuts
½ cup unsweetened coconut
* see Cook's Notes below


Follow the directions as written above.  Makes about 40 truffles. 

Cook's Notes
Packed Dates:  The key to making this recipe easy is moist dates.  I buy my dates in bulk and sometimes they can be dry.  After measuring out the 1 cup of dates, I pour hot water over my dates prior to blending and allow them to soak for 1- 2 minutes.  Drain the water off and then process the dates.  The mixture sticks together much better.
Unsweetened Coconut: I just tried toasting the coconut before adding it and "WOW" ! It tastes fabulous.  It adds a new dimension of flavour, and a little more crunch.  To toast your coconut, use a small frying pan and stir as it warms.  It will brown quickly.  I do mine in my toaster oven which basically broils like an oven.


Enjoy with a hot tea or coffee and friends of course!


Monday, September 20, 2010

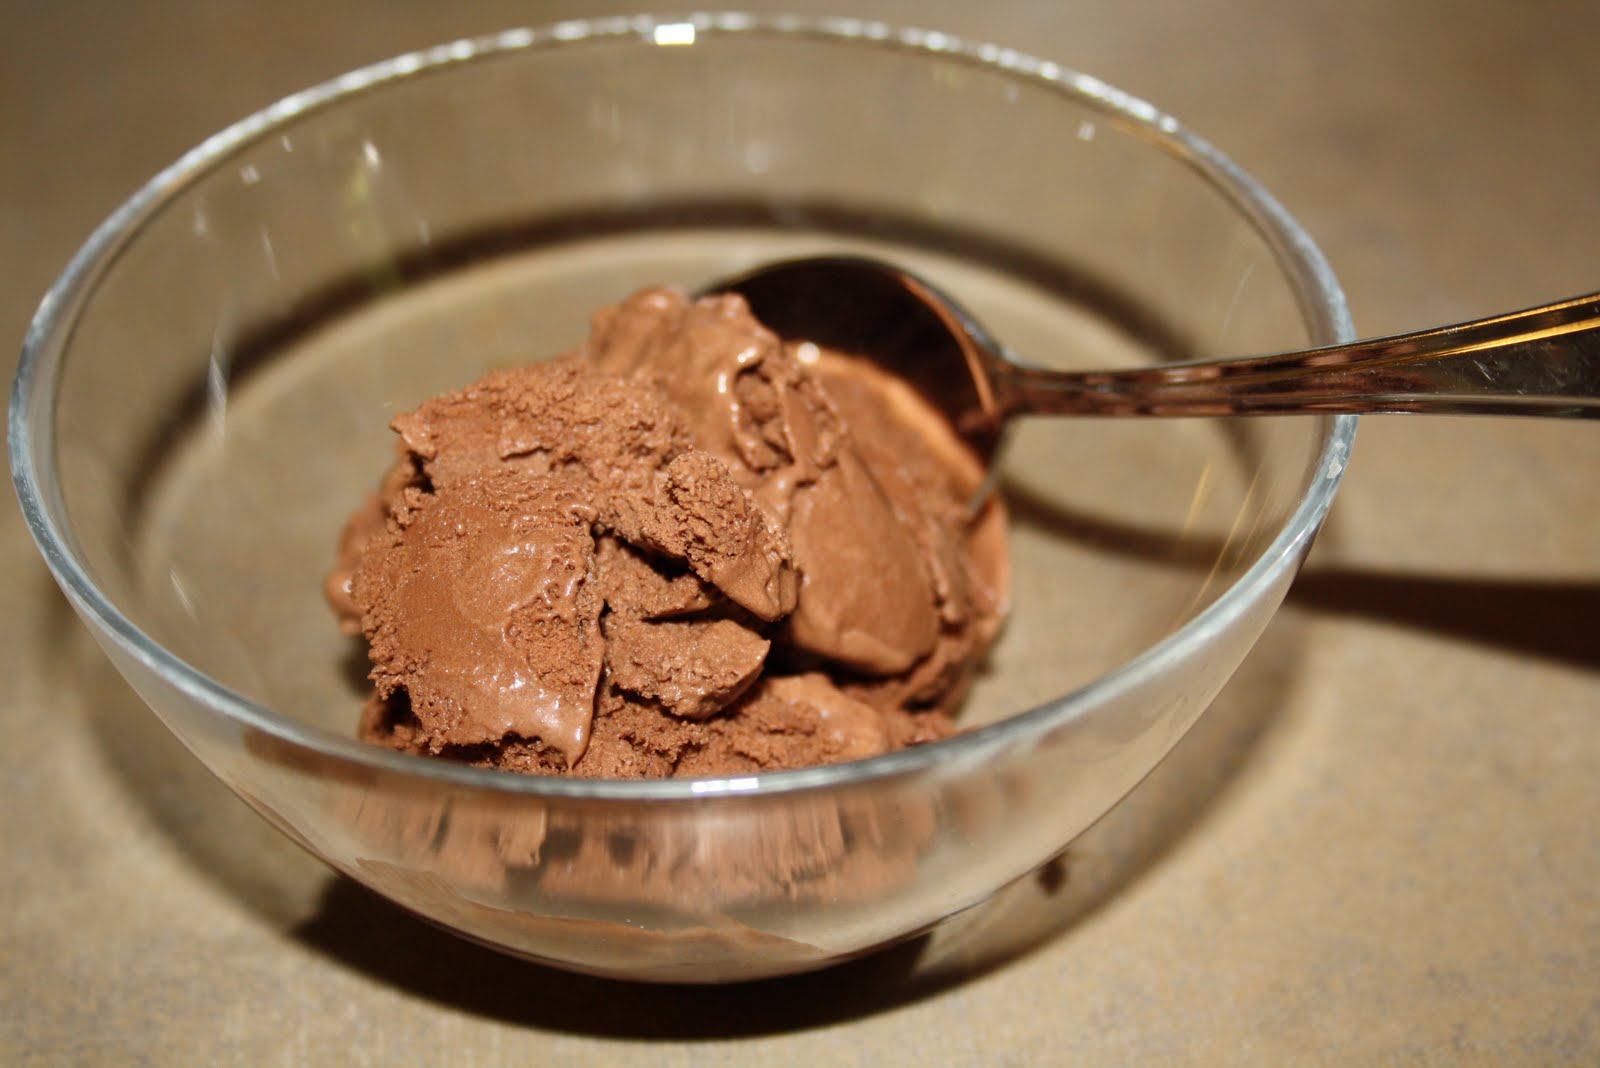
Chocolate Coconut Milk Ice Cream

I love to enjoy ice cream...any time of the year.  So when I was told to remove all dairy from my child's diet, I had the dilemma of how to enjoy ice cream without her being left out (she also loves ice cream!).  And while you can find dairy-free ice cream in the store, the cost for the size was just too much - and still loaded with sugar.  Then I came across this recipe.  The recipe came from a website so to be fair to all, I will only post the few simple ingredients but leave you with the website link so you can check it out. Really worth a try. Super simple,  very delicious and really cheap to make compared to buying dairy-free options. And if you don't have an ice cream maker, don't stop reading here.  See the cook's notes below for an alternate ideas.


Chocolate Coconut Milk Ice Cream

Coconut Milk
Cocoa powder
Agave nectar *
Vanilla extract
Ice cream maker*
* = see cook's notes below


www.thenourishinggourmet.com/2008/05/chocolate-coconut-milk-ice-cream-2.html


I am such a lover of ice cream – no matter what the season is. This one ranks pretty high for me in the like department. Especially since it is simple and cheap.


Cook's Notes:
Toasted Coconut: I personally enjoyed adding toasted Unsweetened coconut on top of my ice cream.  Does that not look delicious?!  If you have never toasted coconut before, use a frying pan on medium heat and stir until it is lightly browned.  Do not add any oil or butter, just dry coconut.  I do mine in my toaster oven - just faster.  Just be sure to watch it closely cause it can burn quickly once it is heated.
 
Agave Nectar: This is a more natural, sweet syrup that can replace sugars and has an extremely low Glycemic Index (it does not impact your blood sugar very much).  I buy mine in the Health-food Section of the Zehrs store.  It is a costly bottle, however good to have on hand for certain foods that apple butter may not work well for.  Other options to use would include maple syrup or honey if you prefer.

Ice Cream Maker: So here are some options...
1. If you don't have one, check with a friend who might have one that you could borrow.  If you don't have a "borrow-from friend", you should find one of those too!  I love mine!
2. If you love ice cream and have always wanted one, try buying it second-hand.  I got mine off of kijiji and it was used once.  Many people get them as gifts I guess and never use them.
3.  You can always go big and buy a new one.  Perhaps you know you will make good use of one that is new.
4. The other option is to make the ice cream and just put the bowl in the freezer.  Stir it every half hour or so until it is slushy/frosty-like.  This may take several hours.  It is not the same as a maker but better than never having tried a recipe as such.